Flannel Shirts,Flannel Casual Shirt,Winter Flannel Shirt,100% Cotton Flannel Shirt SHAOXING UNLESS CLOTHING CO.,LTD , https://www.welconchina.com
how to do a high round back adjustment
Are you struggling with your handcrafted tops and dresses slipping off your shoulders? Or does your neckline tend to ride up in front? Have you attempted a forward shoulder adjustment but didn’t find it helpful? If these issues sound familiar, a high round back adjustment might be just what you need.
As the name suggests, this adjustment is ideal for individuals with a rounded upper back. This curvature shortens the length of that section of the back, meaning you need to add extra length to ensure your garments fit correctly. Today, I’ll guide you through performing this adjustment—it’s surprisingly straightforward and quick.
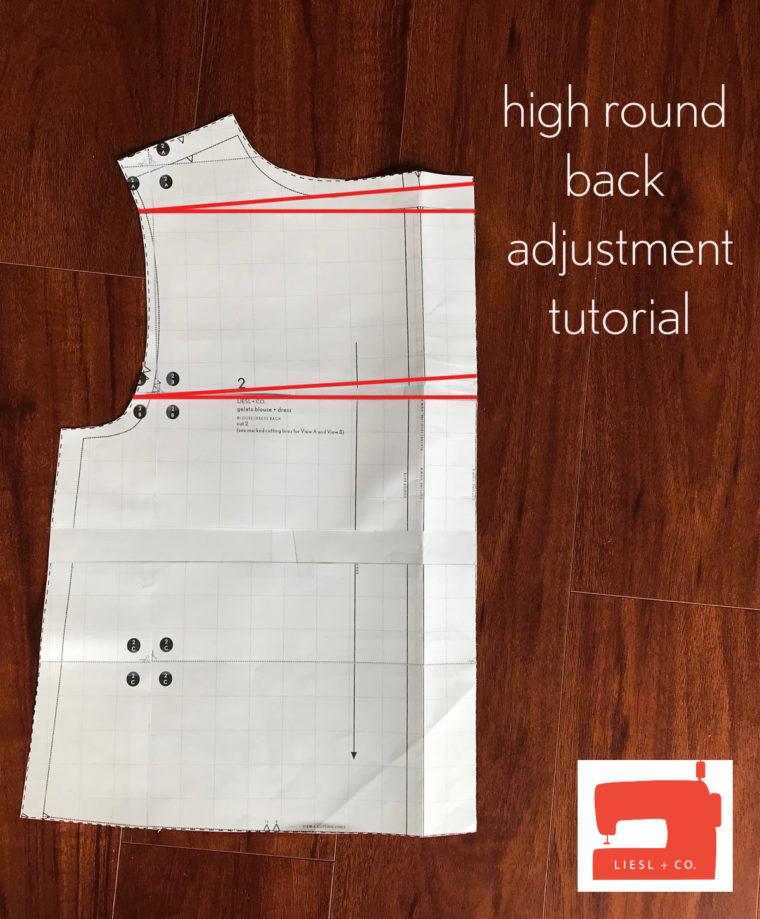
For this demonstration, I’m using View A of our Gelato Blouse + Dress pattern. Since View A includes a back placket, the process requires a few additional steps compared to patterns without plackets. I’ll walk you through both methods—adjusting for a two-piece back with a placket, as well as the simpler approach for patterns with a single back piece cut on the fold or with a center back seam.
### Step 1: Determine the Length to Add
There are multiple ways to figure out how much length to add to your pattern piece:
1. **Muslin Method**: Create a muslin and slice the back bodice piece approximately ½ inch below the neckline, keeping small fabric hinges to connect the top and bottom parts. Pull the fabric above the slash upward to align with where a chain necklace would sit on your neck. The gap left below represents the length you need to add.
2. **Measurement Method**: While seated, measure the distance from the chain necklace point on your neck down to your back waist. Next, measure from the neck seam line on the back bodice piece to the waist point. The difference between these two measurements gives you the amount of length to add.
3. **Trial and Error**: If you enjoy creating wearable muslins, this could be a good option. Start with a 5/8-inch adjustment, as going beyond that requires splitting the adjustment into two areas.
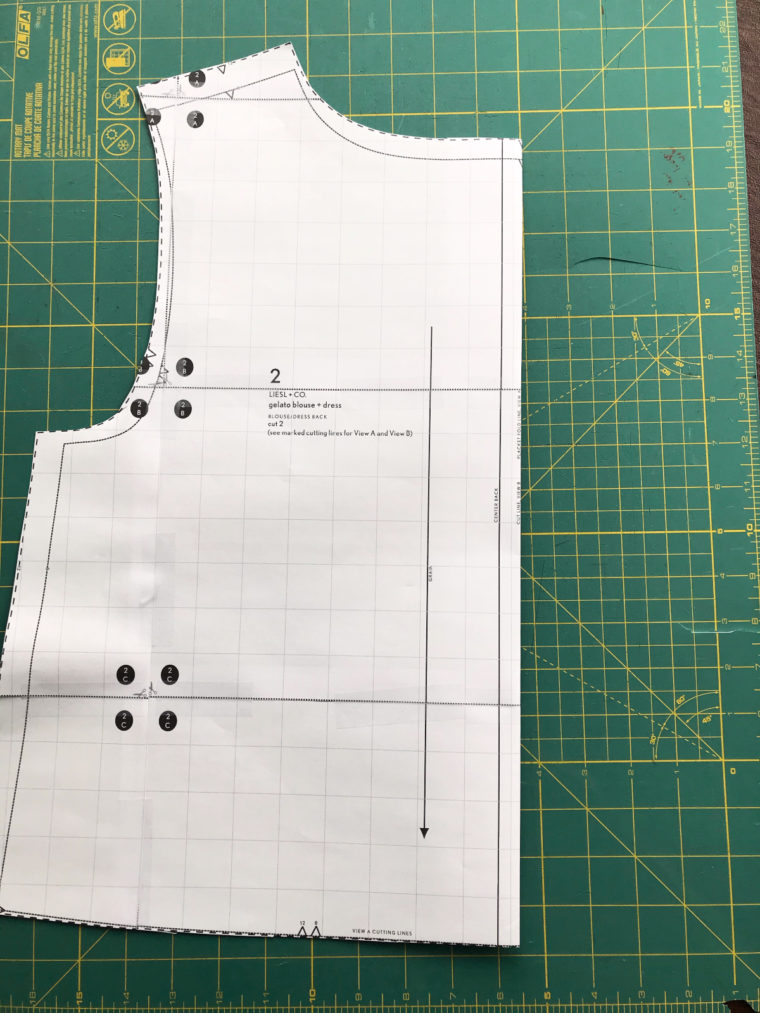
### Step 2: Prepare Your Pattern
The preparation depends on whether your pattern has a single back piece cut on the fold, a center back seam, or a back placket:
- **Single Back Piece Cut on the Fold**: No prior preparation is needed, but you'll add seam allowance afterward.
- **Pattern with Center Back Seam**: Remove the seam allowance before starting, then re-add it at the end.
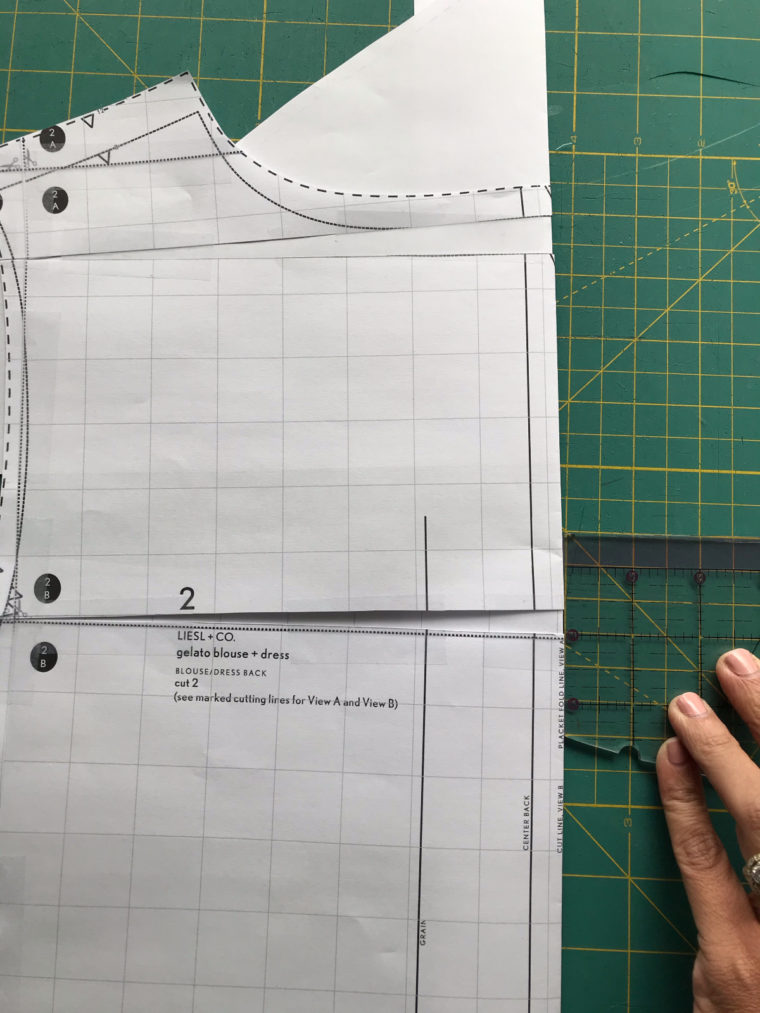
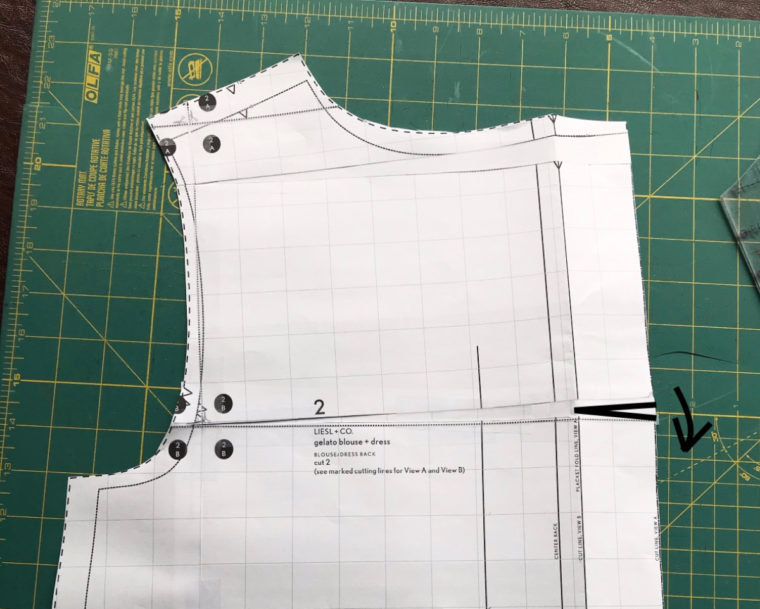
- **Pattern with Back Placket**: Fold the pattern along the fold line. Here's my pattern piece with the placket portion folded to the wrong side:
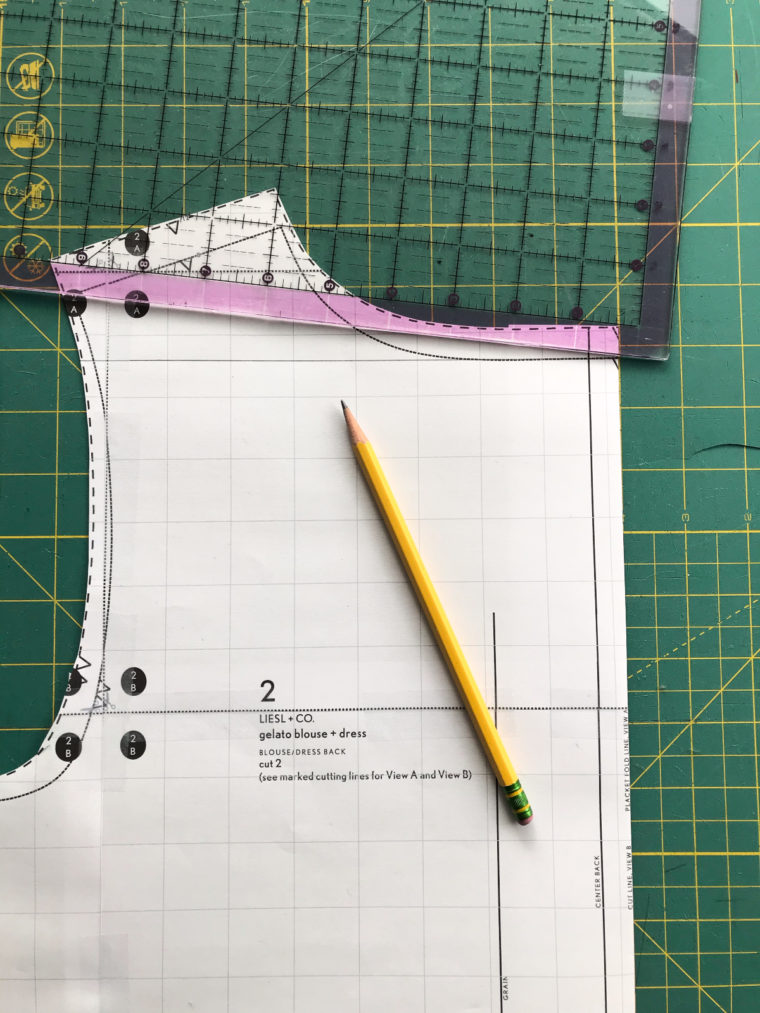
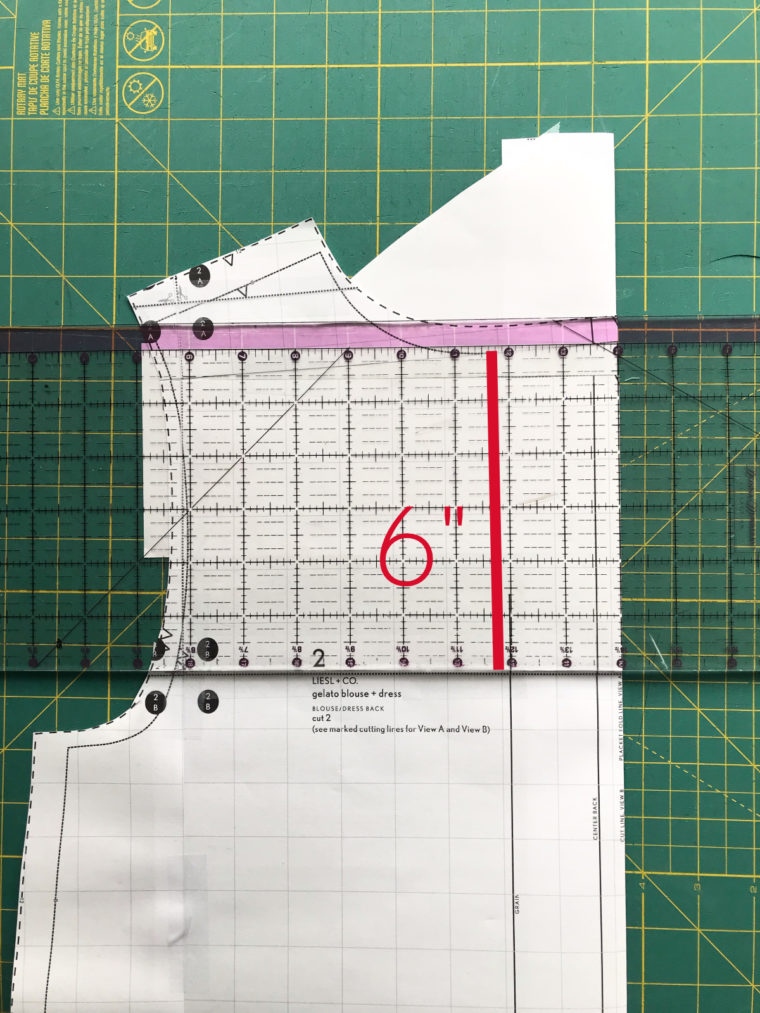
### Step 3: Draw a Horizontal Line
At the neck seam line, draw a horizontal line across your pattern piece. Since the seam allowance is ½ inch, I drew mine ½ inch below the neck edge.
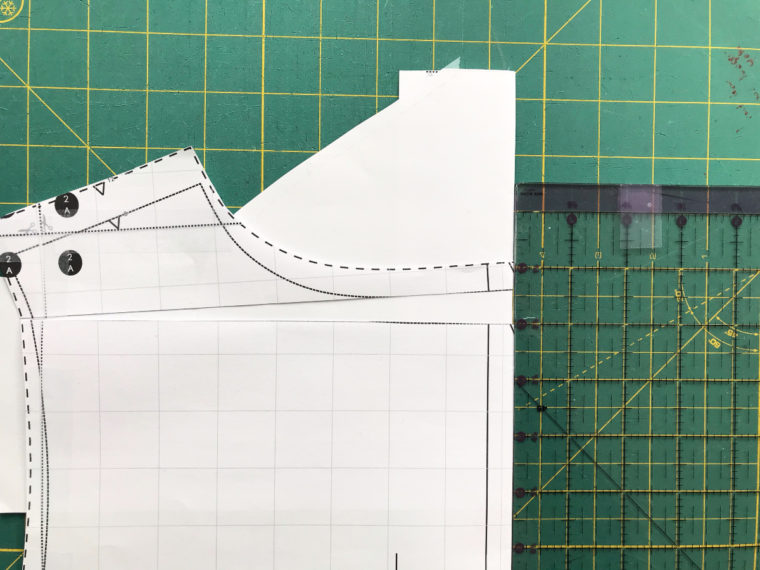
### Step 4: Slash and Spread
Cut along the line you just drew, starting from the center and stopping just shy of the armscye edge. Leave a tiny paper hinge. Insert paper beneath the pattern (I folded my paper beforehand to simplify the process). Gently lift the top part of the pattern and spread it by the required adjustment (up to 5/8 inch). If you need more than 5/8 inch, proceed to Steps 5-6.
### Step 5: Add Additional Length
If you need more than 5/8 inch, you can add the extra length here. Draw a horizontal line 6 inches below the neck seam line.
### Step 6: Repeat the Process
Repeat the slashing and spreading process from Step 4. For a total 1-inch adjustment, I’ve already adjusted my pattern by 5/8 inch at the high back, so I need to spread the pieces by an additional 3/8 inch.
Once slashed and spread, secure the pattern piece in place with tape. If you’re working with a pattern featuring a back bodice cut on the fold or a center back seam, move to Step 7. Otherwise, proceed to Step 8.
### Step 7: Trim and Add Seam Allowance
For patterns with a back bodice cut on the fold or a center back seam, trim the excess paper and add seam allowance. Your adjustment is now complete!
### Step 8: Adjust for Patterns with Placket
If your pattern includes a back placket (like the Gelato Blouse), unfold the pattern. Notice that the placket allowance is higher than the neck seam, so they won’t align properly. To fix this, fold back the placket at the fold line and trim the neck seam to match. Outline the area to cut in black.
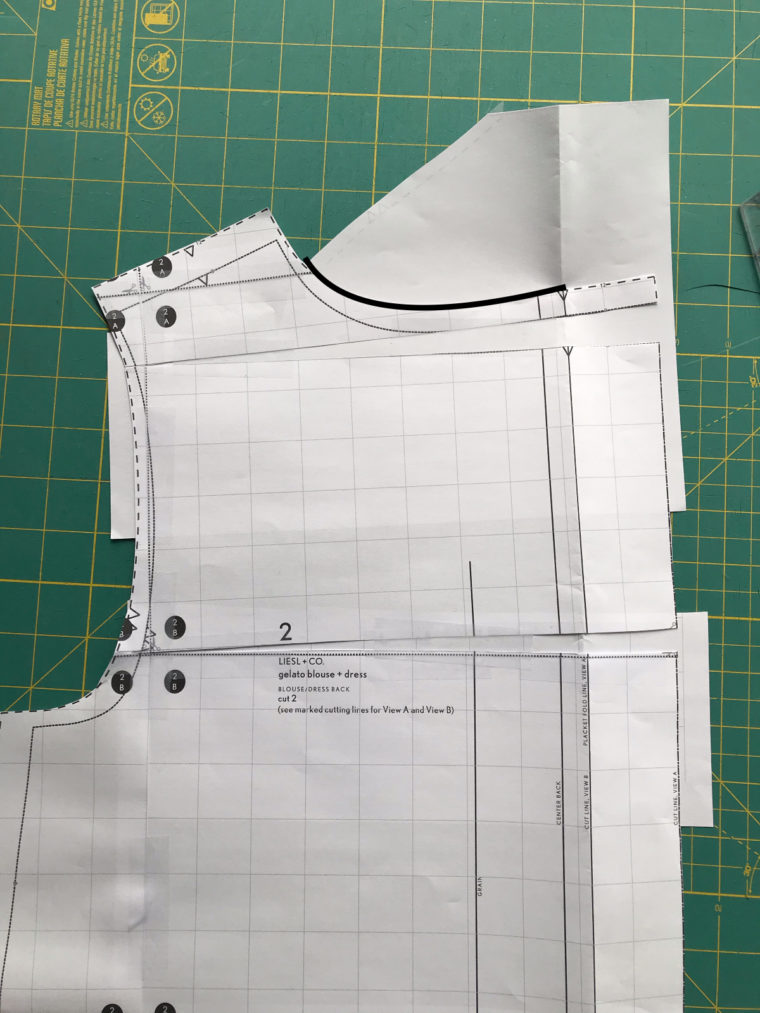
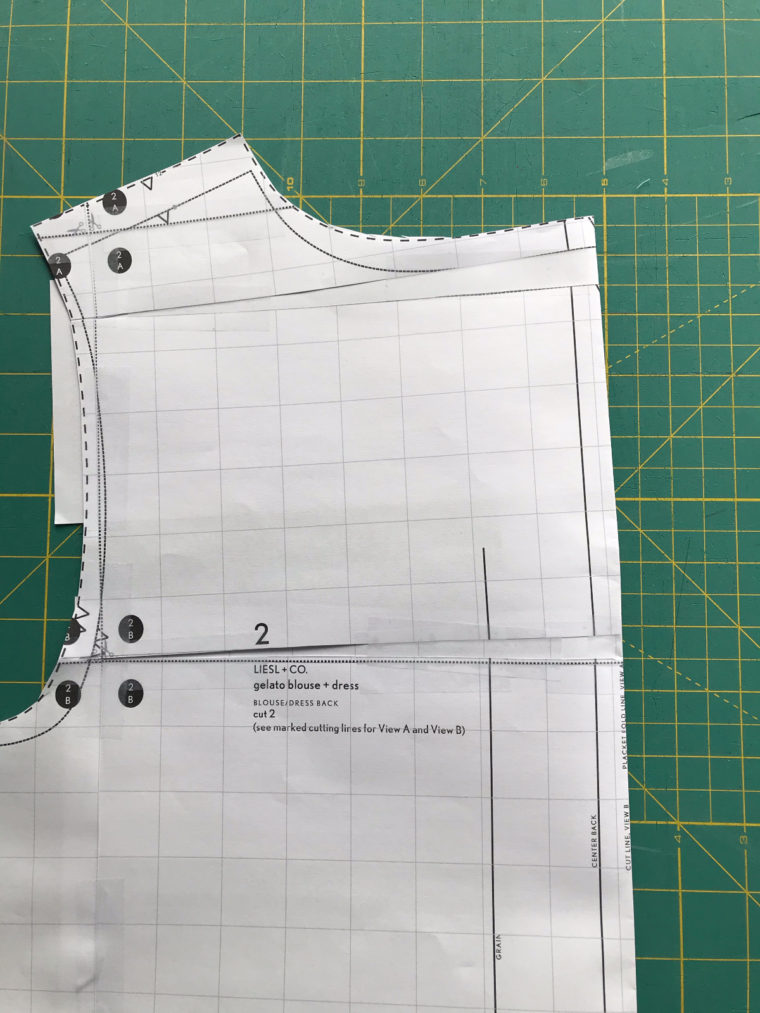
After unfolding, trim any excess paper around the armscye.
### Step 9: Finalize the Placket
Unfold the placket again. Due to the adjustment, the placket edge may be slightly longer than necessary. You have two options:
1. Ease the excess while sewing the placket shut.
2. Shorten the placket edge for a flat finish. Cut from the placket edge to the fold line, overlap the pieces, and ensure the fold is smooth.
Congratulations! You’ve successfully completed a high round back adjustment. With this skill, you’re one step closer to achieving a perfect fit for all your garments.
---
**Final Thoughts:** Mastering adjustments like this opens up endless possibilities for creating tailored clothing. Whether you're a beginner or an experienced sewist, understanding how to adapt patterns ensures comfort and style in every project. Happy sewing!